I stumbled upon this site whilst looking for some ideas for Texture Paste... It was one of those serendipitous discoveries, the use of texture and colours and mixed-media on the art of Robin Ann Walker is highly inspiring, not to mention how well she seems to be doing. Always fun to see someone doing well (and doing stuff I actually like....)
Go have a look, I'm sure you'll agree.
That's all for me for today, I've been working on two unfinished projects myself :) (Krafty Lady projects).
On a sadder note, it seems I have lost my first swap to Aust Post's Monster... I mailed something two weeks ago (minus a weekend) and it was only going to the other end of the country! *sigh* I used to always think I never lost anything but I think it's 4 pieces now (coming here, or leaving here) since 2001. I guess the more you use the system, the more it can fail you... just makes sense (though, frankly, I think ZERO pieces of mail should be lost when they are addressed properly and have enough stamps on them! But I'm a bit of an Idealist!!! )
Until next time, be well.
Friday, June 30, 2006
Tuesday, June 27, 2006
How much do you love your mobile?
Mobile, or cell phone.... everyone seems to have one. We all "know" they are supposed to not be very good for our brains, but it seems millions of teenagers don't care. How many times will a phone ring on my 7 minute bus trip down to Fremantle... Usually at least 3 people get a call while I'm on the bus, even if the bus is not very full. People cannot live without their mobiles. I own one too, it's my lifeline between my children at school and me, the school can call me (my girls do not own mobiles and hopefully won't for a while. I use it as little as possible, but yeah, it is handy!
I used to carry it in my bra... many women carry stuff in there (ever seen that Jamie Lee Curtis interview with David Letterman!) I don't do that anymore, nor do I carry it in my hands if I can avoid it. Nowhere near any of my "female parts", or head... Why? Because I am afraid of cancer!!
If you want to know more, read this article. Interesting, huh? Of course, some brands are probably better than others, but I'm sure some are worse!
So, how much do you love your mobile??
Food for thought, if you like eggs ;)
Sorry, no eye candy or links today. I have to make dinner now. Hmmm, how about an Omelet... Does anyone have a phone they can lend me? Just to make dinner!!
Stay well.
Saturday, June 17, 2006
What I received that is out there on the web
Another little box opened today in my move from that other place, to here. Still no news from my email to them asking them WHY??? it's brutal. Anyway, at least there's no virtual dust in this move, just a lot of rearranging everything. Here, I present:
The gorgeous artwork I was lucky enough to receive.
although, I should point out, not everything is there,
1) because I'm not organised enough and still have some things to upload;
2) because I'm not organised and I might have forgotten to scan something;
3) because I'm not organised and I scanned something but forgot to upload the scan or have misplaced it on my computer. So for all these excuses I beg your forgiveness in advance. I remember sendind a card to someone one time, someone who used to scan and upload pretty much everything, and my card never made it on that person's Web Display, and for months (I've gotten over it now, it was a while ago) I was sure that it was because my artwork wasn't up to par. I'm still not convinced that it was not the case in that situation... but... I try to move past that :) funny brain and the things it makes us think!!!
So here we go:
Other People's "Pieces of Them":
(in no particularly organised order)
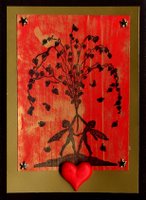
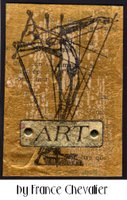
ATCs Album #5
ATCs Album #4
ATCs Album #3
ATCs Album #2
ATCs Album #1
December 2005 onwards (not including Christmas)
March 2005 - November 2005
Birthday 2005
December 2004 - August 2005
Christmas 2003 (selection only)
Christmas 2005 (cards only, no ATC, for ATC see ATC album #3)
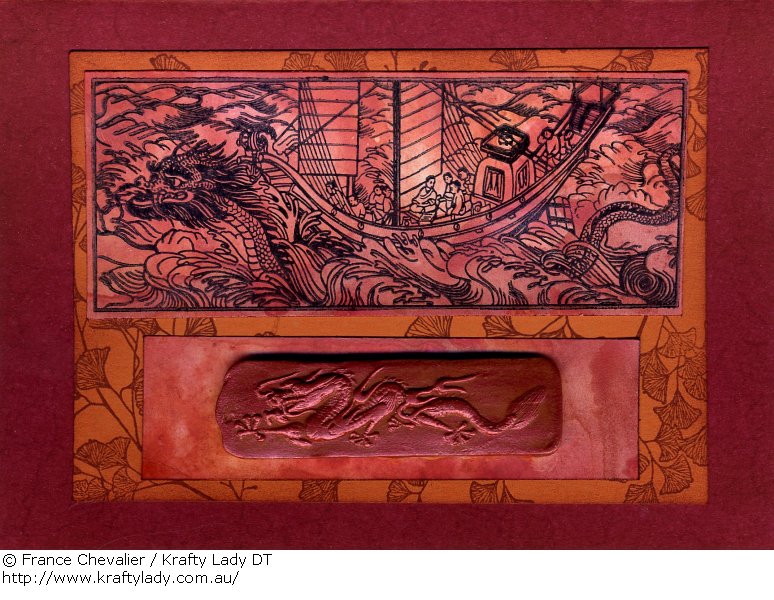
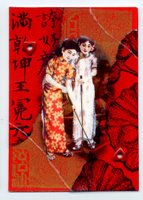
Oriental/Asian art received
The gorgeous artwork I was lucky enough to receive.
although, I should point out, not everything is there,
1) because I'm not organised enough and still have some things to upload;
2) because I'm not organised and I might have forgotten to scan something;
3) because I'm not organised and I scanned something but forgot to upload the scan or have misplaced it on my computer. So for all these excuses I beg your forgiveness in advance. I remember sendind a card to someone one time, someone who used to scan and upload pretty much everything, and my card never made it on that person's Web Display, and for months (I've gotten over it now, it was a while ago) I was sure that it was because my artwork wasn't up to par. I'm still not convinced that it was not the case in that situation... but... I try to move past that :) funny brain and the things it makes us think!!!
So here we go:
Other People's "Pieces of Them":
(in no particularly organised order)
ATCs Album #5
ATCs Album #4
ATCs Album #3
ATCs Album #2
ATCs Album #1
December 2005 onwards (not including Christmas)
March 2005 - November 2005
Birthday 2005
December 2004 - August 2005
Christmas 2003 (selection only)
Christmas 2005 (cards only, no ATC, for ATC see ATC album #3)
Oriental/Asian art received
Friday, June 16, 2006
Caught in Crystal done with Floor Polish
I originally posted this in my Stampamajiggies blog. But I can't see the point of having two blogs when this one has become such a mish-mash of things around me. So I am moving posts on this blog, to delete the other one. I'm trying to post them by marking them with the date they were originally posted. Fingers Crossed.
This post was originally uploaded on: 16 June 2006
-------------------------------------------------------------
Here's a tutorial I used to have on my france.topcities.com website, which went *poof* in a puff of smoke around 17th May 2006! I have no idea why, and I'm cross! Hence my assaulting my blog with a vengeance, filled with useful (i hope) information. I'm still not sure what I'm going to be able to do with the index of TRG, APC and S&P I was working on (with a lot of helpers along the way) but in the meantime, here's my next installment, sort of moving, and unpacking cardboard boxes... one at a time, I'm moving from BottomCities to Blogspot! Here's my housewarming present to you a:
France's Stampamajiggies Tutorial
Caught in... Anna's Way!
A variation on the caught in crystal method, inspired by Anna Keohan.
I tried this technique once, about a year ago, and loathed it. It made a
mess, I didn't like the results, I didn't think I could do it. I was a bit envious of people who did it, people like Anna, who seemed to be so good, and prolific, at it! Anna's creations are what inspired me to give the technique, yet another go. Anna mentioned she uses acrylic paints. Ah! that was quite a revelation, as my reinkers just didn't cut it for me.So, don't let anything stop you, and make sure you look at the list at the bottom of the tutorial for other ways to do this technique. Play around until you find one you like.
There are currently no pictures of the various steps, available for this tutorial. I'll be working on them, one day.
Materials:
Method:
Randomly stamp your chosen image on the acetate. Let dry or help to dry with the use of a heat gun (I skip that step and just let the sheet air dry overnight).
Pour your floor polish into a spray bottle. We all know you won't use it on your floors, and if you decide to, you can always unscrew the nozzle!
Take the acetate and place it face down on a piece of newspaper or scrap paper. Seal all edges with packing tape. I like to secure the edges with scotch tape (sticky tape) before using the brown packing tape.
When the edges are sealed, spray a small amount of the floor polish on to the acetate. I like to spread it with my fingers (gloved preferably) or a paint brush which I rinse straight after. You don't want a whole lot of liquid on your page, you do want a thin film.
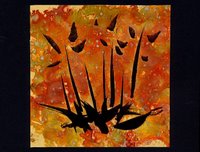
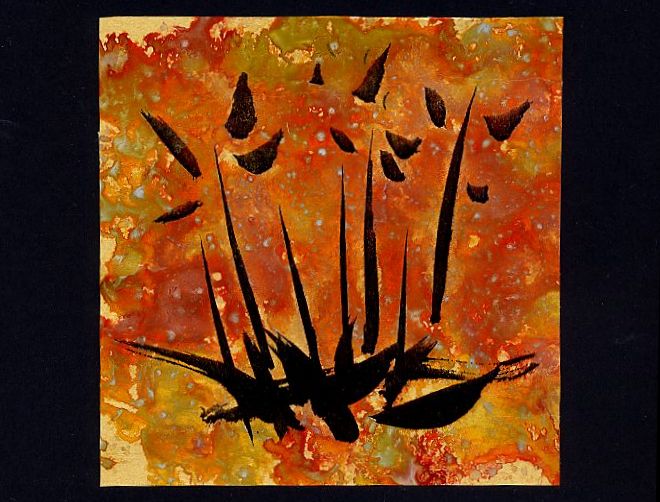
If you do use glitter, sprinkle it on now. As much or as little as you want, it all depends on the effect you wish to create. Let dry. When this is dry, dab small blobs of paint randomly over acetate, just enough to smoosh around to cover the whole surface. Spray a bit of the floor polish to help the paint glide over the surface more easily. Using a paint brush or a gloved finger ( or a couple of fingers!) gently smoosh the paint and the floor polish together, until the whole area is covered - go gently and try not to muddle the colours together too much, as it may end up looking 'muddy'. Rinse the paintbrush or your fingers. (I'd like to thank Anna for her description of that step, no one does it quite like you, Anna!!) ~ in the sample above, I used only one colour of paint, pale gold by Jo Sonja, as that's the look I was after.
When this is done, take your piece of tissue paper, scrunch it all up. Open it up, smooth it out somewhat, and lightly spritz it with the water bottle.Place the tissue paper carefully on top of the painted/floor polished surface. I find this is easily done if you start at one edge and slowly place the tissue paper down on the surface, you avoid bubbles that way.When you've finished putting the tissue paper down, what I like doing is gathering the tissue paper a bit, in areas, to create valleys and ridges.It creates patterns which add to the depth of the texture. Using your paint brush, in a gentle stippling motion, pat down the tissue paper so that there are no bubbles and that the tissue paper adheres to the floor polish.Add a bit more floor polish if necessary.
Let dry.
Cut the sheet in four. Adhere to a card with double sided tape (make a test first, the tape might show with various colours of card and/or tissue paper) or with brads or eyelets in each corner.Affix an insert. And you're done.
Of all the links I had, these are the last two that seem to work. there are many names for this technique, have a look on the web. Some people do that technique with PVA as well, or Dimensional Magic/Crystal Lacquer etc. (floor polish and PVA are the "craft on a budget" alternatives.
You can also find those techniques under different names: Caught in Crystal, Crazy Glass, Window Plastic, etc.
This tutorial © 2003-2008 France Chevalier (but I did not invent the tech, you can't copyright a technique but you can copyright instructions! Very interesting).
Hope you enjoyed this technique. LMK if you try it!
This post was originally uploaded on: 16 June 2006
-------------------------------------------------------------
Here's a tutorial I used to have on my france.topcities.com website, which went *poof* in a puff of smoke around 17th May 2006! I have no idea why, and I'm cross! Hence my assaulting my blog with a vengeance, filled with useful (i hope) information. I'm still not sure what I'm going to be able to do with the index of TRG, APC and S&P I was working on (with a lot of helpers along the way) but in the meantime, here's my next installment, sort of moving, and unpacking cardboard boxes... one at a time, I'm moving from BottomCities to Blogspot! Here's my housewarming present to you a:
France's Stampamajiggies Tutorial
Caught in... Anna's Way!
A variation on the caught in crystal method, inspired by Anna Keohan.

I tried this technique once, about a year ago, and loathed it. It made a
mess, I didn't like the results, I didn't think I could do it. I was a bit envious of people who did it, people like Anna, who seemed to be so good, and prolific, at it! Anna's creations are what inspired me to give the technique, yet another go. Anna mentioned she uses acrylic paints. Ah! that was quite a revelation, as my reinkers just didn't cut it for me.So, don't let anything stop you, and make sure you look at the list at the bottom of the tutorial for other ways to do this technique. Play around until you find one you like.
There are currently no pictures of the various steps, available for this tutorial. I'll be working on them, one day.
Materials:
- Stamp(s) - In the sample, I used a Bauble by Rubberstamp Ave
- Acetate (I used "Highland film for plain paper copiers" described as"economical film for most plain paper copiers" available at Officeworks)
- Memories Black ink or Collections Private Label Black Dye Ink
- Acrylic paints (Anna adds: and/or metallic folk art acrylic paint eg Plaidbrand "coz the colours available are so yummy, and you do get a hint of the metallic gleam through the acetate")
- Pile of old newspapers
- Pascoe's Long Life Self Shining Floor Polish (in the USA: Future Floor Polish, in New Zealand: Johnson's One and All)
- Spray bottle to be filled with above Floor Polish (and to be hence,dedicated to the cause. But do clean the nozzle each time to avoid blockage)
- Spray bottle filled with water (yes, a different one!
- Glitter (I like glitter with this technique)
- Packing tape (clear tape will do too!)
- Disposable gloves
- Paintbrush and little container of water
- Heat gun (I don't use it, some people do)
- Tissues/Kleenex or toilet paper, paper towels (not always necessary)
Method:
Randomly stamp your chosen image on the acetate. Let dry or help to dry with the use of a heat gun (I skip that step and just let the sheet air dry overnight).
Pour your floor polish into a spray bottle. We all know you won't use it on your floors, and if you decide to, you can always unscrew the nozzle!
Take the acetate and place it face down on a piece of newspaper or scrap paper. Seal all edges with packing tape. I like to secure the edges with scotch tape (sticky tape) before using the brown packing tape.
When the edges are sealed, spray a small amount of the floor polish on to the acetate. I like to spread it with my fingers (gloved preferably) or a paint brush which I rinse straight after. You don't want a whole lot of liquid on your page, you do want a thin film.
If you do use glitter, sprinkle it on now. As much or as little as you want, it all depends on the effect you wish to create. Let dry. When this is dry, dab small blobs of paint randomly over acetate, just enough to smoosh around to cover the whole surface. Spray a bit of the floor polish to help the paint glide over the surface more easily. Using a paint brush or a gloved finger ( or a couple of fingers!) gently smoosh the paint and the floor polish together, until the whole area is covered - go gently and try not to muddle the colours together too much, as it may end up looking 'muddy'. Rinse the paintbrush or your fingers. (I'd like to thank Anna for her description of that step, no one does it quite like you, Anna!!) ~ in the sample above, I used only one colour of paint, pale gold by Jo Sonja, as that's the look I was after.
When this is done, take your piece of tissue paper, scrunch it all up. Open it up, smooth it out somewhat, and lightly spritz it with the water bottle.Place the tissue paper carefully on top of the painted/floor polished surface. I find this is easily done if you start at one edge and slowly place the tissue paper down on the surface, you avoid bubbles that way.When you've finished putting the tissue paper down, what I like doing is gathering the tissue paper a bit, in areas, to create valleys and ridges.It creates patterns which add to the depth of the texture. Using your paint brush, in a gentle stippling motion, pat down the tissue paper so that there are no bubbles and that the tissue paper adheres to the floor polish.Add a bit more floor polish if necessary.
Let dry.
Cut the sheet in four. Adhere to a card with double sided tape (make a test first, the tape might show with various colours of card and/or tissue paper) or with brads or eyelets in each corner.Affix an insert. And you're done.
Of all the links I had, these are the last two that seem to work. there are many names for this technique, have a look on the web. Some people do that technique with PVA as well, or Dimensional Magic/Crystal Lacquer etc. (floor polish and PVA are the "craft on a budget" alternatives.
You can also find those techniques under different names: Caught in Crystal, Crazy Glass, Window Plastic, etc.
This tutorial © 2003-2008 France Chevalier (but I did not invent the tech, you can't copyright a technique but you can copyright instructions! Very interesting).
Hope you enjoyed this technique. LMK if you try it!
Other people's stuff: Jewelry, Origami, and Colouring
I originally posted this in my Stampamajiggies blog. But I can't see the point of having two blogs when this one has become such a mish-mash of things around me. So I am moving posts on this blog, to delete the other one. I'm trying to post them by marking them with the date they were originally posted. Fingers Crossed.
This post was originally uploaded on: 16 June 2006
---------------------------------------------------------------------
Today I thought I'd share some links I like:
Tricia B True's Jewelry, an Origami Christmas Tree by Karen Thomas and Colouring Tech I think even I can do by Sija from The Netherlands
Sija's Great Colouring Tips using Stone House Stamps - Now, this is a colouring technique I think I should try as I think I might just be able to do it! Those who know me know I'm not big on colouring (only because I don't feel very good at it!) - I prefer backgrounds!
Tricia B True has made some wonderful jewelry and she sells it too! I met Tricia through the Oriental Stamp Art list. She's a nice lady, so even if you don't buy, go see, and email her to let her know what you think of her stuff!!! I love those beaded bracelets!!
A great little Origami Christmas Tree by Karen Thomas! Easy peasy and the results are stunning!
Ok, while I'm sharing links, here's a couple more:
You Send It - Lets you send large files, without the instability of some email clients. I managed to send up to 10MB in one file to a friend using my Dial Up Connection.
Two great sites offering information on Geishas: Wikipedia and Immortal Geisha
That's all for today!
Enjoy!
PS: if you like Sija's work, stop by my friend Barb Porritt's website and get yourself the ArtSpecially books (if you live in Australia you can order from Barb, if you're elsewhere there's links there for you to order your copy locally)
Wednesday, June 14, 2006
What is Cold Laminate?
I originally posted this in my Stampamajiggies blog. But I can't see the point of having two blogs when this one has become such a mish-mash of things around me. So I am moving posts on this blog, to delete the other one. I'm trying to post them by marking them with the date they were originally posted. Fingers Crossed.
This post was originally uploaded on: 14 June 2006
---------------------------------------------------------------------------
Cold laminate is the name given to techniques using "Quick Laminate".
Brand names for that, the one I usually buy is Marbig, available at Post Offices (and also Kmart I believe, I pick mine up when I go buy stamps). Any clear sticky sheet apparently works.
Great, now what do you do with it?
You can stamp on the shiny side, with permanent black ink. StazOn is great, but many have had success with Memories, Ancient Page and the like.
When you have stamped on the shiny side you can do a few things:
cut out the image and stick it to a background before you stick the image down you can colour the sticky side with either pearl ex, gel pens, krylon pen to highlight some areas, paint (acrylic, lumiere, etc) here's some other ways of colouring which were given to me a while back when I asked the question:
Gel pens, chalks, glitter, nail polish (even $2 cheap ones, and some are metallic too!), Marvy Metallic markers, Pearl Ex, Eye colour shadow you no longer use, watercolour pencils, you can apply leafing foil, variegated leafing flakes, etc.
If the back is no longer sticky after having applied the colour use some clear adhesive like Crystal Laquer, Dimensional Magic and the like, or if you have large black areas on the image you can use double sided tape.
There is another method to use those Quick Laminate (QL) sheets...
Take a photocopied image (toner photocopy, the "good old photocopies", magazine images also work, and I hear that laser-printed images work too). Stick the image onto the sticky side of the QL (so the side with the image you want to use is on the sticky side. When you do that, beware of a few things: lint and stray hair, they are almost impossible to remove once stuck, and also that the QL is filled with static and sometimes jumps on the paper (or vice versa if you place the QL on top of the paper) and can stick in the wrong place, so do this step carefully and take your time.
Trim the QL if you need to.
Smooth the image onto the QL, and then soak in a bowl of cold water (and I suspect that's where the COLD comes from, Cold Laminate Transfer, it's the transfer that is a cold transfer, done with Laminate, but we all call Quick Laminate "Cold Laminate"... ) - if the water is warm, the adhesive will soften and you don't want that.
So, soak in cool water for .... 5-10 minutes. I usually wait until I can see that the paper has absorbed some water.
Then with the tip of your finger, rub the paper off the QL. It will roll off. If you still see paper, wet some more and rub some more. It's usually best to try to remove all of the paper as if you place the image onto a dark background, you
see the paper leftover and it's not a good look!! :)
Allow to dry, do not use a tissue or anything to dry, a heat tool will melt the QL and a cloth/tissue will leave lint behind!
When the piece is dry, it will be sticky again ... and you can also see if you removed all the paper (hold to the light , or over a dark surface). If there's some paper left, repeat the soaking/rubbing steps.
You can try this with clear packing tape as well. And other clear sticky labels (Avery or other).
When the QL is dry, you can decorate with the "colouring" methods described above.
Sites with inspiration/instructions:
Hero Arts
Try It Tuesday
BHG.com
Samples on Flickers
Etcetera Web Zine shows a quick method to laminate pins.
Archive of Ginger Stamp (the original site seems to have a glitch, but this link above is working fine.)
Enchanted Ink
Whiskey Creek Stamps
and from Natalie this link: Trishbayley.com
[images added 17 jun 2006]
This post was originally uploaded on: 14 June 2006
---------------------------------------------------------------------------
Cold laminate is the name given to techniques using "Quick Laminate".
Brand names for that, the one I usually buy is Marbig, available at Post Offices (and also Kmart I believe, I pick mine up when I go buy stamps). Any clear sticky sheet apparently works.
Great, now what do you do with it?
You can stamp on the shiny side, with permanent black ink. StazOn is great, but many have had success with Memories, Ancient Page and the like.
When you have stamped on the shiny side you can do a few things:
cut out the image and stick it to a background before you stick the image down you can colour the sticky side with either pearl ex, gel pens, krylon pen to highlight some areas, paint (acrylic, lumiere, etc) here's some other ways of colouring which were given to me a while back when I asked the question:
Gel pens, chalks, glitter, nail polish (even $2 cheap ones, and some are metallic too!), Marvy Metallic markers, Pearl Ex, Eye colour shadow you no longer use, watercolour pencils, you can apply leafing foil, variegated leafing flakes, etc.
If the back is no longer sticky after having applied the colour use some clear adhesive like Crystal Laquer, Dimensional Magic and the like, or if you have large black areas on the image you can use double sided tape.
There is another method to use those Quick Laminate (QL) sheets...
Take a photocopied image (toner photocopy, the "good old photocopies", magazine images also work, and I hear that laser-printed images work too). Stick the image onto the sticky side of the QL (so the side with the image you want to use is on the sticky side. When you do that, beware of a few things: lint and stray hair, they are almost impossible to remove once stuck, and also that the QL is filled with static and sometimes jumps on the paper (or vice versa if you place the QL on top of the paper) and can stick in the wrong place, so do this step carefully and take your time.
Trim the QL if you need to.
Smooth the image onto the QL, and then soak in a bowl of cold water (and I suspect that's where the COLD comes from, Cold Laminate Transfer, it's the transfer that is a cold transfer, done with Laminate, but we all call Quick Laminate "Cold Laminate"... ) - if the water is warm, the adhesive will soften and you don't want that.
So, soak in cool water for .... 5-10 minutes. I usually wait until I can see that the paper has absorbed some water.

Then with the tip of your finger, rub the paper off the QL. It will roll off. If you still see paper, wet some more and rub some more. It's usually best to try to remove all of the paper as if you place the image onto a dark background, you
see the paper leftover and it's not a good look!! :)
Allow to dry, do not use a tissue or anything to dry, a heat tool will melt the QL and a cloth/tissue will leave lint behind!
When the piece is dry, it will be sticky again ... and you can also see if you removed all the paper (hold to the light , or over a dark surface). If there's some paper left, repeat the soaking/rubbing steps.
You can try this with clear packing tape as well. And other clear sticky labels (Avery or other).
When the QL is dry, you can decorate with the "colouring" methods described above.
Sites with inspiration/instructions:
Hero Arts
Try It Tuesday
BHG.com
Samples on Flickers
Etcetera Web Zine shows a quick method to laminate pins.
Archive of Ginger Stamp (the original site seems to have a glitch, but this link above is working fine.)
Enchanted Ink
Whiskey Creek Stamps
and from Natalie this link: Trishbayley.com
[images added 17 jun 2006]
Let's make a start!
Well, enough with the whining, I'm ready to act!
Here is where I have stuff... on the web, at Webshots and Picture Trail.
Presenting, in no particular order, my various "stuff I made" on the web.
- My "pieces" for the Krafty Lady Design Team
- Ooops, Oh no!!! I think this is my most popular album!
- Asian/Oriental
- ATC album 1 and ATC album 2
- My First Star Book Made at the end of 2004
- Smudges in Time DT Gallery
- Altered Book - haven't played with that one for a while!
- Swaps Items made for various 2004 swaps
- 2004 Creations - A selection (need to update those! Note to self!)
- Published creations - cards and others, published in Australian magazines. I just got published in Vamp Stamp News in the USA! Will show this soon!
- Cute cards I made a while ago! Just so no one can blackmail me, EVER! hehehe!!

You can also spot some of my work here (some links might be broken, feel free to let me know! No time to check them today! I know, bad bad blogger I am!!):
- A Monthly Rubber Stamps Club (great place with heaps of info!)
- April 2006
- Anniversary Contest/Competition
- September 2005(using Brenda Marks's gorgeous To Dye For backgrounds!)
- December 2005
- February 2006
- April 2006
- Stonehouse Stamps: Gallery (Stonehouse Stamps' Home is here)
- About Art Accents Gallery and Contests: No. 1, No. 2, No. 3, No. 4
- Smudges in Time Design Team Gallery (Feb'05 to Sept'05)
- The Stampsmith - Featured Artists #5 and Gallery #7, Valentine (at the bottom), Gallery #10 (near bottom)
- Creative Zone under I am Woman Gallery and Tag Art Reader Gallery October 2003
- Oriental Stamp Art Online Zine - Spectrum
Issue #1 (Cover Art)
- Time to Stamp Gallery or these direct links: Gallery 1 and Gallery 2)
- Qwikart Art Stamps in various showcases
- Christmas Gallery at Rubberstamp Avenue
- Designs Ink'd: Gallery and Tutorials [seems this site/company is now retired]and at Unmounted Central
- StampMania Australia (WA) a little red Oriental card in the Gallery
- PipeDreamInk's Opals gallery (artwork no longer displayed but it was a little brooch!)
- FibersFromAfar where I was a design team member for a couple of months
- I have a card in the Stampers' Mall (which I'd forgotten about!)

Well, at least now I know where I stand!!! And Topcities can have 20c and call someone who cares!
I'll be back in a day or two with my "art received" albums!
Tuesday, June 13, 2006
Where did it go?
I had a website, it showed my work (stamping) and now it's gone. It also had a section of my favourite recipes and very useful recipes for little ones. But It's GONE!!!! I emailed Topcities asking why, I haven't heard back yet. I'm sad. It just annoys me, I don't say, if I was someone like Joe Vialls (RIP) ... a notorious Western Australian who had a mission to promote the TRUTH (911, bird flu, you want it, he had it!), and he made a lot of enemies doing so... but heck, I'm just showing my little bits of artwork! I guess I'll have to post more here, and add links to some albums where I hide my addiction as well.
Anyway, this is what annoys me today!!! People offering free webspace and then *$#&@ you over, and it's not the first time. I used to be on Geocities, but they removed the FTP access! *sigh*
Well, maybe I should plug the New and Improved Krafty Lady Design Team Website :) That keeps me happy!!!
I'll be back when I have something to say, I know there was something else but I can't think of it right now... Probably another whinge.
Enjoy your week!!
Subscribe to:
Posts (Atom)