Showing posts with label polymer clay. Show all posts

Wednesday, August 06, 2008

Fun(d)Raiser

I'm selling four items in my Etsy shop, as a means of raising funds for OrientalStampArt's new website. OrientalStampArt is a Yahoo!Groups community for Rubber Stampers who love the Asian/Oriental style of images. The group has been around for many years and has some of the most enthusiastic members around!

Affiliated with the group is a fabulous website, I invite you to have a look: http://www.orientalstampart.com/

That website is so jam-packed with information and artwork that our current server cannot handle the sheer amount of goodness we have to offer, and it has to be upgraded. This costs money.

Selling these items I made is my contribution to the cause.

All proceeds of this sale will be going DIRECTLY to the website upgrade.

Postage on this item is FREE to the buyer.


For more information on OSA see this glorious review by fellow Australian Carole Meisenhelter


Here are the items up for grabs:


That's all I have for today.
Yesterday I celebrated 10 years of landing in Australia for a "new" life.
Tomorrow, we'll see what tomorrow brings :)

The Maneki Neko necklace has been sold already as has the magnet with the Geisha holding an umbrella.

Monday, July 28, 2008

Faux wood, rice pudding, and a preview

I've been having another faux wood/scrimshaw attack... months after I actually made my turtle necklace (see previous posts). A technique can be very addictive when you enjoy it, I try to use it as much as I can!!!
But first, I'll point you towards Julz's Blog as she tried this technique and her results are wonderful. I've yet to bring myself to actually texturise the wood...

Oh, and you MUST SEE Kim Cavender's wood cuff, oh and this one too, they are absolutely gorgeous... When I grow up I want to clay like that!! Have a look at the rest of the cuffs while you're there (and the rest of her work. If you're not familiar with Kim's work, you should be!!).

And these are my latest "faux wood/ivory/scrimshaw" efforts:

I've also done some colourful playing, assembling some casts I'd made a little while ago. I used some oval jump rings for this. I'd probably need to hammer them to make them stronger! I'll get to that eventually. I even made the little clasp but it didn't fit in the picture.

I just love this mould. It's called AM019 Med Etruscan Shield and you can see pricing on this page near the bottom. This is the mould used in the top pendant too. The round pendant was made with AM332 X5Lge 7 UP (prices available on bottom of this page). You can order these moulds through various people depending where you live. If I get myself organised, I plan on bringing a few pendants to the next craft meeting, we're having a pre-loved sale, and a "bazaar" of things we make ourselves, if nothing else, it'll be great eye candy for everyone to see what everyone else has been up to :)

Here's something else I made with the Etruscan Shield:

And with two products I've been wanting to try for a while, some Sheer Heaven Vellum, and Tim Holtz's Adirondack Alcohol Inks!!! I've been using Pinatas, and quite like them (bought them before the T.H.A.A.I. were available) but, like many, I am a sucker for the colours in the Adirondack range! Specially Terra Cotta and Butterscotch!!! *grin* That stamp is one from The Stampsmith, which I hadn't used in a looooong time!!! I think I stamped it in Russet, from the Archival range (also from Ranger).

I'm also hoping to be shown the ropes of Felting, by Kylie Mell who has been playing with felt a bit. I saw her do ONE DOT and saw a gorgeous little calico bag she'd made. It's contagious! I've used the back of one of my calico bags to experiment on, so far, added 3 felt hearts (cut out from Spotlight felt) and even made a freelance flower with a stem, with fibres I felted myself. It's not perfect, but it's satisfying somehow... yup, all I need is another craft! Though, anything that is quick and yields good results is what I prefer these days as my time is limited and evenings are usually spent preparing something for the next day's lunches. My two are a bit ... how can I put it, particular about what they like and don't like, and I can't make anything with peanut butter, due to allergies (I respect that, but it does make my life a bit difficult as pb, but... I'd really hate to be the parent who sent a pb sandwich to school and killed a child!!!)

Speaking of food made me think of this recipe which I quite like on cold Winter weekend mornings: Creamy Rice Pudding, just make a bit more rice than you need for dinner, and you have the perfect excuse to have that the next morning! I made it without the egg the other day as we were all out of eggs, and it wasn't as thick, but it was still delicious. It did have a strange-ish but pleasant taste but that's entirely my fault as I went to pour in some cinnamon (I love cinnamon, I add it and nutmeg to the recipe) and realised, only too late, that I'd put cummin in there! I scooped out as much as I could (I don't think I love cummin in the same quantities as I love cinnamon). I kidded myself that it was an Indian breakfast! I did enjoy it. The girls didn't want to touch it, and by the time DH got up, there was none left ;)

I still haven't received my copy of Altered Arts Magazine, in which a tin I made is published, so I'm giving you a sneak preview anyway:


Hmmm, well, I can't wait til the postie brings this mag home!!!

Monday, July 07, 2008

Electronic Copy of Beads Etc is available!

Click to see the page at Beads Etc. Click to see the page at Beads Etc.

If you subscribe to the newsletter you can see the whole magazine for free, and have access to past issues too!
The mould is from Krafty Lady.
Although I did mention it when I sent the article to the magazine, they didn't print it (well I didn't see it when I read it quickly, must read it more in depth, but then I wonder why since I wrote it, after all!)... the idea for using only two colours to get the look, came from this faux scrimshaw tutorial. I credit the technique throughout the Krafty Lady site! So apologies to my inspiration, I did try to give you credit in the article!

Thursday, June 26, 2008

A picture is worth a thousand words

Beads Etc. Coming out in July! I am so very excited!!! The turtle necklace (upper right) is mine :) made with a Krafty Lady mould. Didn't they do such a great job with the photography!!!
Beads Etc, July 08

Below, page in June 08 of Vamp Stamp News (also very excited)

VampStamp News, June 08
The Egyptian, Paris, Blue Kimono and Daisy pieces are mine.
Stamp credit:
Egypt: Non Sequitur
Blue Kimono, Daisy, and Paris: Inkastamps
Moulds by Krafty Lady


VampStamp News, June 08
the necklace is mine, this was on the back of Vamp Stamp News (June 08). Beads are stamped polymer clay, stamp from About Art Accents, focal bead is from Krafty Lady.

And I also have a tin coming out in Altered Arts, also in July, but don't have the magazine yet. What a busy month... and I haven't submitted anything since so that'll be it for a while in that field!!

Monday, June 09, 2008

Frangipani

Oooh, I've been having fun!!!

With my Frangipani Mould from Krafty Lady


I made a skinner blend plug (I think it's called a plug, though it might be more of a bullseye cane, yeah, that's what it is! A bullseye cane!)


I cut a part of it which I reduced further, and cast them in the Frangipani Moulds


Yes, my skinner blend needs a bit of work, you can see rings, but it's good enough for me! Aren't they great? I'm thinking with yellow buna (if that exists) or even white or even black... (I'm not picky, I love black!) and the little frangipani either for earrings or as a toggle on the back!

Just oh-so-excited!!
For more ideas with the frangipani mould, have a looky here! And when these are baked and made into something, you'll see them there too!!!


Edited to add a nice picture of Frangipanis, found on the El Yunque National Forest site

Sunday, April 27, 2008

Oriental Pendant


I just uploaded this to My Etsy, part of my efforts to destash and fundraise for our car (it needs a bit of a repair! it doesn't run at all at the moment)! *sigh* I hope to list one item a day for the next little while. It's a goal. We'll see if I can persevere.

Yes, our car died yesterday, and they announce rain all week, it's back to the "old fashioned way", gotta do the grocery shopping by bus again. Good thing I always knew this could happen and I still have my little "old lady bag on wheels" :)

On the upside, I found a friend (Hi JK!) who shares a guity passion for CSI:Miami so we're swapping episodes! Fun!

Nothing much else to report. So I'll leave it at that.

Friday, April 25, 2008

Earring Caddy


earring caddy
Originally uploaded by France : acanuckinoz

I've been wanting to make one of those for a while, and now I have!
I used to buy chicken/rat wire, and hang a large piece on my wall, and hang all my earrings from there. At the bottom, I would have S shaped hooks that you get from Ikea, to hang necklaces. My rack stayed in Canada when I moved here, and since we rent, I haven't even thought about asking permission to put in nails in the wall, but I'm working on an idea for the wall...
I have so many missing pairs of earrings, or singles, it'll be nice to have one place to put them all! Still working on a way to make the base a bit more sturdy.
I've been in touch with Stacey to see if she'll repost the instructions for the caddy, they are fairly simple anyway, you can sort of guess how just by looking at the pic.

i've made a few more things lately but since they are off to being submitted to VampStampNews, I can't show anything just now.

I also recently purchased some Aanraku bails and am in the process of making some very simple pendants (yeah, I keep thinking "Etsy" but I never quite get there!).

Ok, better go make dinner. And of course, the day wouldn't be complete, according to the girls, without Anzac Slices, a recipe based on Anzac Biscuits. We don't have relatives (luckily) who were in the war, or any war that I know of... but it's still a day where we have a thought for all those who lose their lives in these needless conflicts. I think it takes a very special kind of person to join the army, kudos to those who do, and thank you (I just wish the people in power wouldn't send you off to war!)

Monday, April 21, 2008

I've been tagged (again) and I finished my faux ceramic pieces!


I've been tagged by Zeborah Loray
This is how it goes:
1. Once you are tagged, link back to the person who tagged you.
2. Post THE RULES on your blog.
3. Post 7 weird or random facts about yourself on your blog.
4. Tag 7 people and link to them.5
. Comment on their blog to let them know they have been tagged.
Here are my 7 random facts about me. They pretty much are still the same things I would say now, except maybe I'd add that I loved Hotel Babylon and had to find a way to watch Season 2 as Aussie TV hasn't put it on yet, and also have had to find a way to get my hands on episodes of CSI Miami cos it's been cancelled everywhere in Australia other than Victoria (where they have a blackout of Underbelly!) - so I guess, I'm addicted to a couple tacky shows ;)

Now, to tag 7 other bloggers:
Can't do that *grin*. If you do want to be tagged however, do let me know and it'll be my pleasure to do so :)

This said, I'm glad Zeb tagged me because I didn't know about her blog, and through her blog I found Annette, Barb, and AfterMidnight's blogs!!!
---------------------------------------------
I've been busy with Faux Ceramics (edited as I'd previously called it Porcelain. Go figure!)!! Finally finished my set of Krafty Lady Christmas Decorations!!! Yay! I'm pretty happy with them, and am finding that I'm getting the hang of the technique now, better than that necklace I made!! But I still like the necklace. :)

Anyway, Santa's eyes leave a bit to be desired, but I was never really good at painting, but overall I'm really excited about the results! If you want to learn about this, see my posts tagged "faux ceramic" (in the list on the right) I did cast these with Sculpey Ultralight, which I find, pound for pound, to be less expensive than regular polymer clay, and I find it works quite well for me for this technique (though I have no idea of long term results!) - they will all go up on Krafty Lady but ... here's a sneak peek of my Christmas set!!


I've made two more pieces, even including some rubber stamping! It'd been a while since I'd gotten out my stamps, it felt really nice, but I also felt like it's taking a while for my muse to be awake... But I had fun, and that's the main thing!
I'm submitting them to a magazine, so if they don't get accepted you'll see them here, or on the Krafty Lady galleries (Design Team's or Main Gallery).
----------------------------------------------------
Better get in the laundry before the sun sets, it's been getting cold here lately... all of a sudden Summer is gone and it's Autumn! (though, really, Autumn officially starts here on 1st March!)

Again, thanks for stopping by :) It's really nice to see people from all over the world on my Feedjit map! Even if you stop by only for a brief moment, it's nice to know YOU were here!!

Tuesday, April 15, 2008

Yet more talk of Faux Ceramic and some eye candy

After scouring the web to find a "free source" for a technique similar to this tutorial I bought on ePattern Central, a few weeks ago, as a friend wanted to know the technique and I didn't feel too right sharing the paid-for-tutorial-in-a-pdf-with-a-password-even, two more posts about Faux Ceramic popped up on the blogosphere! I just had to post about THAT :) good things come in threes!! I guess.

Crafty Goat who links to Laura Griffin who credits Patricia Kimle for the original tutorial in Step by Step Beads magazine... well... Patricia Kimle is the author of the tutorial I bought on Pattern Central.com (Bright Light Beads)!!!


Today we went to Point Walter and saw up to 9 black swans at some point! Some were funny, they'd swim with one leg, having the other one sticking outside the water. The first one I saw like that, I thought had a broken leg, but then I saw three of them do it, then put their leg back in the water. Strange habit ;) I think I saw a dolphin fin too, but never saw it resurface... then again, maybe it was the Loch Ness monster *VBG* (I'm pretty sure I saw a dolphin's fin!)

It was a beautiful day with a temperature of about 26°Celcius! Just so relaxing!!!

I uploaded a few new pieces on the Krafty Lady website:

Shell Earrings

Another Notebook!
------------------
Now I don't know if any of you got alerted to many new posts by me today, I'm sorry if you did. I decided to close my other blog (Stampamajiggies) where I planned on having tutorials, and place the posts here on this blog. This blog is such a mish mash of my whims and fancies that structure is the least of my problems, and then people don't have to go to two places. I still intend on updating (well, as up to date as it was about three years ago) the magazine index, to have it here on the blog as it's on a website that I don't even know if it exists anymore.... but that is SO different than what goes on here, that it's ok to keep it separated!
So they are all moved, all nine posts (as many as the black swans!) so this should be the end of mayhem! I hope :)

Sunday, April 13, 2008

Another Faux Ceramic Tutorial!

Yay! Love it when things happen like that. Just yesterday I was posting about a Faux Porcelain/Ceramic tutorial and today, while reading Parole de Pâte (in French, with some English Translations), I find another tutorial I'd stumbled across before but couldn't find!! I remembered the picture quite vividly and thought I'd seen it in a book, but couldn't find it! It's HERE!!!

FUN!!! There's one more way to make porcelain looking beads on Parole de Pâte and this one has been translated in English.

Ooops, gotta run, it's Sunday, laundry to do, polymer clay to bake, grocery shopping to be done (heck, if they are opening shops on Sunday, I'll procrastinate Saturday, of course!)

Enjoy the school holidays!

Saturday, April 12, 2008

Beads and moulds

I found neat tutorials for wire here and I subscribed to the newsletter.

There's the "dailies" (or would that be dailys?)...
Of course, we all know about Polymer Clay Daily, but there's also Beading Daily and I also found Polymer Clay @ Craft Gossip, they gossip about other crafts too:
CraftGossip Homepage, Knitting News, Crochet, Bath And Body, Candle Making, Jewelry Making, Scrapbooking, Recycled Crafts, Needlework News, Cross-Stitch, Indie Crafts, Felting, Stamping, Quilting, Polymer Clay, and Sewing ! Now, that ought to satisfy just about everyone!

I was particularly happy to find this post (linking to an old tutorial) because I bought a tutorial from ePatterns.com on how to achieve this effect -- it wasn't very expensive, but I didn't feel right telling the secrets as I know those authors make money from the sale of their instructions and I hadn't been able to find the same instructions for free elsewhere on the web, so I felt a bit bound by copyright issues, kwim? So now that I found a tutorial, I don't feel wrong pointing to it. I'm not giving away all the secrets of the project, but now you can achieve the glazed look... ;)

I did find however that this technique doesn't leave a rock hard finish, but rather a rubbery feeling finish... Maybe I'm doing something wrong. This was my first necklace with the technique:
I have another few WIP (work in progress) with this technique... I quite like the effect of the blue!! Looks like old porcelain or something.

Something else I liked finding at Craft Gossip was this post is about Amanda, a local Western Australia clayer! That was neat!

Ok! It's public now!!! There are new Art Moulds© on the Krafty Lady site! See here (AM332 to AM340), and here (AM341 onwards).


This little pic is just to whet your appetite, go to the site to see more!!!

Saturday, February 09, 2008

my bracelet, finished!

Click to see that pic on Flickr

Well, dunno what's up with me, but I've been creating and I can't seem to stop (though I will have to to do laundry and the groceries, ... eventually!!!)
I got highly inspired by this blog and decided THAT was the way this tiled bracelet needed to be put together.

I made the tiles using the Krafty Lady domino set (AM245) and just love the way they look. The translucent doesn't look great in the pictures, it's a bit better in person. I got to use all sorts of odds and ends (Julie K, if you do stop by, you may recognise those charms!). I wish this was candy, because I am sure it would taste really nice!!!
I had a heck of a time with my jump rings, sometimes I think I need to make some oval ones, rather than use store bought ones (I got lazy, took me long enough putting it together without making my own jump rings, though I did make "some" of them... but yes, sometimes odd shape rings, oval or rectangular, would probably be a lot better than trying to force a round ring through the drilled holes on the side of those tiles. I still think I need to take a course in "proper" jewellery making!!!
ciao for now.

Friday, February 08, 2008

One amphora, two amphorae

Yay! this was so much fun to make!!!! An Amphora Necklace!!


With a tutorial from Tina at beadcomber.etsy.com, scrap clay, a mould by Krafty Lady (AM330) and a whole lot of patience!!
I also used a buffing wheel made today, as per the instructions on Desiree's Site, wahoo! What a shine!!! I'm going to make a second one soon, I can just feel it!!! I did however supaglued/crazy glued the discs to each other and pierced a small hole in the middle so my mandrel could securely screw in. I saw that tip in another tutorial, but watch out to not glue your fingers!

I've also made those when I was in my Faux Bone Craze (I still am, I just ran out of the mix. Will have to make more)

I've been in a very creative mood lately and tried to make a bit of time to make stuff!!!

It feels good!

late addition: my other Faux Bone can be seen here

Wednesday, January 30, 2008

Jif removes Pledge One Go from Polymer Clay

did you know that?
Jif, I think it's known in Canada as Vim (at least I think it was when I lived there!), removed the Pledge One Go from my pen...
How did I make this discovery? Well, today, I was not happy with the prospect of binning my pen just because it didn't work, so I tried removing the tip (I noticed somehow the supaglue/crazy glue I used wasn't that great and the eyelet could be rotated).
So I pulled, so you know the story (read yesterday's post to see what happened AGAIN!)... I tried removing the plastic bit with a tiny screwdriver, no go... then I thought "A drill bit!!!", well that worked fine (see, learn something new every day!). Messy, very messy, but it worked". I also now know that toothpaste is good to remove ink stains from white plastic vanities (we rent, so we don't have a say in what we get).
Finally got the plastic bit out, and today I bought some BIC pens! Sorry PaperMate, but Bic didn't let me down the last time I made a pen (following a Donna Kato Tutorial) and it won't let me down this time either (I HOPE!)...
OK, so the opening was a bit too small for the extra bit Bics have, so I drilled it out a bit to make it wider, and it fits fine, but it's a "short" pen, so I had to cut the ink well again! But my other pen didn't cause me any trouble.

There, my memory gets a bit blurry as to what I did... but I noticed that the operation I had to perform on the pen (again, read yesterday's missive) didn't quite work as I had anticipated!

There was a .... GAP!!! and from that gap, it seemed something was escaping: INK!!

*sigh* and *blerk* ... sooooo, I take the pen to the bathroom, tried to clean it with toothpaste (that's where I stained the sink with the ink, so used toothpaste and an old toothbrush, and it finally took the stain out, and I hope, no scratches!) but no dice, the ink stayed on the pen... so Jif came to mind, and that worked pretty darn well (also almost got rid of the stains on my hands!). Yay, clean pen, gaping wound running the risk of oozing more blue goop (aka: ink), almost clean hands! Dry the pen... and think of a solution to fil the gap! Then, I noticed, my pen wasn't shiny anymore... the cap was, but the bit of the cap where I had to scrub (oh yeah, stained THAT too) wasn't shiny either... ergo: jif removes pledge one go!

hmmm, and what will I do about the gap.
Well, the gap has been fixed with some super duper electrical tape -- so my pen now has a black band around it, where I had to cut it! Reminds me of my old pair of Doc Marten's when I was in college - my hippy/granola/"nature" period I guess -- held together by duct tape!!! The things we do when we're kids (I only did it cos other cool kids were doing it, well, kids which were cool in my eyes!).

Now I have to decide if I re-Pledge it, or not... I had to use tape, I did, because I had visions of that pen popping it's back end in my bag and the mess that would have made (not that my bag is not usually a mess, but you know, you try to prevent these things when you can!).

Well... other than that, I cleaned up some "will be earrings" bits (while I had the old toothbrush out) after sanding them. Got my pasta machine out of the garage (for a technique I can't wait to try) and I'm working tomorrow and Friday, hmm, school starts Monday *Evil Cackle* (Seriously, working during school holidays was a bit hard on this mum, and the holidays went by way too fast because of it!)

And here (eye candy) are some tiles I'm going to make into a necklace. I found an inspiring way to assemble them, now to find good jump rings that don't come apart!

Tuesday, January 29, 2008

My Cursed Pen


This turned out to be a long post, and rather than make it three different posts, I've divided them in sections.

1) My "Woe is me" story :)

I tell you, sometimes things just don't go the way you want them to!
Yesterday, I decided to have fun with Polymer Clay. It had been a while, and I had been inspired by this display and by the tutorial "Covering Pens with Polymer Clay: Bamboo Skewer" here on Youtube.
So I get some clay out, the purple and pink are right there, as is my translucent and pearl, sounds like a good mix. Looking good. Tutorial instructions are good, I'm doing great, baking goes well, nothing burns (Yay!), I take the skewer out (no problem there) and place the first "ink pen bit" inside to see what it'll feel like... ok, feels great, let's remove the "ink pen bit"... OH HORROR!!! The METAL bit of the "ink pen bit" comes out, but not the plastic bit containing THE INK!!! it is starting to come out - oh, and yeah, I'm right in the middle of making dinner at this point and have meatballs about to get a bit too cooked. Ok, don't panic, put the pen on some (hopefully) scrap paper, go and turn over the meatballs, and insert a skewer to see if the plastic bit will just get pulled out by some kind of magic, why not, my logic is wood bit inserts into plastic bit, sticks cos of the gooey ink, and it all comes out a treat. NO! IT DOES NOT! And I didn't use a crap brand, I used Paper Mate?!
what can I do, it's disgusting..... I have visions of the mess!!!
Ok, CUT a bit off the pen at the other end, and push the plastic-inky-bit out...
Get my blade out, try to do a nice straight cut so that it'll be easy to glue back.
OK, cut is made, and oozing blue ink (YUK!), push out the plastic bit, ok, put it in the bin, make sure it's in the big bin, the one lined with a plastic bag, and thankfully it's rubbish night that night!!!
Ok, check on dinner, all's well, nothing burnt, I try to rinse the pen shaft and yeah, looks like the water comes out clear. *phew*... serve dinner, eat dinner, yum yum yum...
after dinner, glue the bit I had to cut off back on, with Supa Glue... I am scared to death each time I pull out the Supa Glue! I won't want to end up looking like Edward PenFingers or anything like that! Ok, that works well. Can't think of any elastic I have on hand (nor could I find any I would have thought of) so I opt for a Buna cord to tie the lid. Good idea. Ok.
Sand, first off to sand off the ink on the OUTSIDE of the pen! Luckily it works great. Sand, Pledge One Go, one coat, two coats, yup, I'm on a roll.
Pen assembled, little eyelet glued on too, though I hesitated there because I wondered ... how long my pen would last. IT promised to be a kilowriter, i.e. to write more than 1000 words (hmmm, well, in this age of computers, it's not too bad? maybe?), oh well, it'll last as long as it'll last and I'll probably lose it before the ink runs out!
Wow, it works great, I showed it to hubby and I got a "that looks like stone or something" rather than the "I'm not sure what I'm supposed to say" when I present him with strange projects like an altered bottle (I can't blame him!).
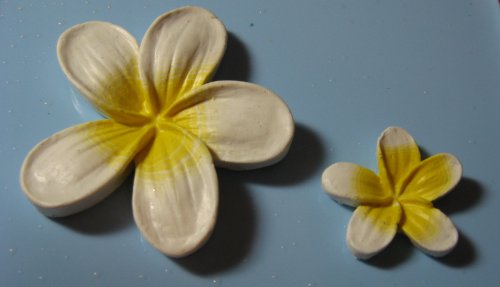
This is my pen:


Well, this morning, I take it out of my bag to make a phone call (need to take notes during this particular phone call) and, you'll never guess what, it is not writing words anymore! nope, none, nada, done, dead... AND SUPA GLUED IN THERE!!!!! *sigh*
That's pretty much the end of this story. I now have a gorgeous pen that I can't even use!


2) My "My Megalomania Inspired Me" story


Well, you know, sometimes you're just in a funk, you can't create, you create and things like the story above happens, or you just don't have time to create, or even maybe you question why, having no time and no inspiration, you still don't want to pack everything away or put everything up on eBay. Other than the fact that 1- I'm too much of a scavenger/pack rat, and getting rid of my supplies would mean I wouldn't "have" them anymore, and putting them away in boxes would frustrate me if I ever want anything from out of one of those boxes (let me tell you my new storing method is not making me very happy, even if it has cleared up a bit of the kitchen! I always have to go to the other end of the house to look for something I've put away (seriously though, it is an improvement, but it doesn't have to always make me happy, does it? at least now we have room for our dishes in the cupboards!). Anyway, having everything packed far away would not suit me, and my other reason is that if I don't have time to create, why would I have time to put my craft stuff on eBay? And if I'm going to have time for eBay, wouldn't I be much more satisfied if I took this time to create...
Anyway...
Another angle to this story requires me explaining that I wanted a screen saver for my computer because my screen was too bright, and given the position of my computer and the position of the hallway and our bedroom, it was bothering me to see this bright screen when I have insomnia. Yes, I can turn the screen off, but those new screens can also stay on all the time... (some argue that turning off the comptuers for the night is also a good idea, but not when you have downloads trickling in!) ANYHOW... that's when I decided on my current screen saver:
I have all my scanned artwork in a folder, so I used the Microsoft "Slide Show" Screen saver option (don't quote me on its name though), and pointed it to the folder where I have my artwork. At first I thought "hmmm, isn't that a bit weird, having your own artwork up there?" and then I thought "it's the only organised enough folder to be able to do this with!".... well, seeing my artwork when I get up, or when I've not been at the computer for the amount of time it takes for my screen saver to kick in (dunno, can't remember, but it's adjustable) I get inspired, seeing old creations, recent ones, ones I'd completely forgotten about, seeing stamps I'd forgotten I'd owned, stamps I sold and was happy to have done so, background and stamping techniques I'd forgotten.

example, this piece from February 2004

or this one below from October 2003

Hmmm, I do like brown tones, I guess!

These little Collections squares from the end of 2006 bring back memories


and this bright cheerful About Art Accents card from the same period was also fun to see because of its simplicity and cheerfulness:


I have found it very inspiring, and it has motivated me to try and find time to create. So yeah, sometimes a little bit of self-centered-ism can be a good thing! Although every now and then I think "ooh, poor so-and-so, I remember sending them this awful card... didn't seem awful at the time, but that was years ago" sort of thing! Keeps me modest.


3) My work

Many of you are curious about the type of work I do. I am an Assistant Analyst (that's what the job's advert said)and I work for Mining Industry Consultants. I do a LOT of work with Excel, play with LOTS of numbers, and also I receive samples which I have to prepare to send to laboratories, most of which are Iron Ore, I see very pretty colours, though most of it is of a dark brownish red colour. I get to wear a lab coat on the days I play with the pulverised rock, and a mask (so I don't breathe too much in). I feel like I am in a hospital, or that I'm part of the CSI team! LOL! Hmmm, the original CSI probably? Dunno. TBA! hehehe!!! I don't do much analysis myself at work, but I do prepare things for analysis, and once in a while they let me read a report, it's been almost 5 months! And I'm still enjoying it. So I hope that answers your questions, dear friends :)


As a silly segue and to show some eye candy, here's my "rock", a ring, made with polymer clay, and the small one of AM236 XXLge Oval Set from Krafty Lady. That one was made with Pearl, Translucent, and Maroon clays (Sculpey III), and some Duo Red-Blue Pearl Ex, and my trusted Pledge One Go (if only I used it on my floors! hehehe!)

The ring looks crooked but it has been glued on straight. It was just a wee bit big for my Hand Model this morning, so it sort of slid to one side.

I think I'd better press the "publish" button now!

Monday, May 28, 2007

The beads from the Spiral Bead Swap

Here they are, the fabulous beads I received in the Spiral Bead Swap! Carolyn and Ada's tags were still on so I didn't re-write their names. I wore Charlotte's necklace I made the bail with wire, and I left it on the necklace to scan.
I was really happy with my returns!
I have scanned the charms but yeah, will redo that one as not all the charms were actually on the chain. I need to make jump rings, and it's just one of those little things I haven't gotten around to.

Friday, February 16, 2007

I can cane!

I originally posted this in my Stampamajiggies blog. But I can't see the point of having two blogs when this one has become such a mish-mash of things around me. So I am moving posts on this blog, to delete the other one. I'm trying to post them by marking them with the date they were originally posted. Fingers Crossed.
This post was originally uploaded on: 16 February 07
------------------------------------------------------
Well, I saw this fabulous idea for a cane on Parole de Pâte and I wanted to give it a go. A neat cane... though I didn't have the same colours, but that wasn't going to stop me. Took what I had, made a semi-skinner blend (i.e. a skinner blend not completely blended) and went with it, oh, and threw some Metallic Gold Leafs in there (i.e. gold in colour, but not real gold) for good measure, and proceeded with the instructions. It was my ...hmmm... third cane? I have tried to cane before, this was the first time I succeeded somewhat better than the other times... so I played!!! I like to think of it as my first cane, as it's the first one that didn't turn out in a muddy mess... though, my jelly roll had a bit of a gap in the middle... maybe that's why they put cream in the middle of edible jelly rolls, so there's no gaps!!!

see, you can see the gap... but given the techniquie requires poking then squishing the piece of cane... that gap didn't bother me too much, but there's something I can improve on.

Below are earrings I made. Cute huh? Didn't even use moulds!! Love my KL Moulds, but it's fun to improvise at times and make something "free hand" so to speak. I love those French Hooks with the flat bit on them too, got those from The Bead Co. here in WA! They had interesting findings! and good prices, imo!!

Now, how much should a pair of such earrings go for??

Then I made some beads.... yup!!! the colours are quite nice, the gold clay I used and the Green Pearl (both Sculpey III) have this mica shifting particles and they shimmer, really nice!!!

The first on the left is done by wrapping a slice of the cane (not a slice like you slice bread, a slice from the side... as in the tute) around a chunk of scrap clay. The other two are done by wrapping slices (a la bread slice) of cane around COSC (chunk of scrap clay?)... I warped the cane for the middle bead, into a triangular shape, that worked nicely too. and on the round bead, you might not see it, but there's even bits of reduced cane there too!!! AMAZING! hehehehehe!!!!!

Hmmm, then, I had a bead that didn't work... so... what do I do? I swirl, of course! and two or three coats of varathane later (Flecto) you have this:

Pretty!!! If I may say so myself.

In a future post I will show you other ways in which I've used some of the cane slices, with Krafty Lady Art Moulds©
Posted by Picasa

Tuesday, January 16, 2007

Been busy?

A friend commented that my blog hadn't been updated since November! How is that possible? Who is in charge here? Do I need to fire anyone? well, me, probably :) So I come here to blogspot, and notice they are not in Beta anymore and I have to switch my blog (thought I'd done that already), and then I notice my template needs updating (doesn't feature some of the new features I've seen on other blogs) so I start playing around, it says it's saving my old template... but now I can't find it anywhere, I *think* it's somewhere on the 5 x 4 GIG DVD Backups DH did for me recently! Luckily they are somewhat organised, so I might be able to find the last one that worked... That's what I get for being too clever ;) but like another friend said, there's enough dumming down! So I'm proud to be clever and make mistakes :)

Though, I just realised that means I'll have to add my links all over again ... and also that there's a bug in the blog, my current post, made in Jan07, shows up as being Dec06 for some reason. ... ??? weird :)

I've been really quiet lately because I have had my energy sapped by the end of the year frenzy, and also because I have been suffering from Plantar Fasciitis, which is making me a miserable guts :) I've also noticed, now that the pain is so prominent, how long I've been having problems with my legs and feet! Anyway, I'll spare you the details, but I'm doing what I can to get rid of them... I did however get a pair of Crocs Shoes (yes, I know!!! how bloody TRENDY! hehehe!) and they are wonderful... they are very smooshy. Wish I could order an Rx pair from the USA site though, they have a pair made specially for plantar fasciitis... maybe I'll get one of my agents on the case :)

This said, I've been busy again at Krafty Lady, both in updating the galleries and the DT pages, and creating a few things... never a dull moment. Our current project is really cool and I can't wait to unveil everyone's artwork!!

Hmmmm, I guess I should give you a bit of Eye Candy... ???
I've uploaded a Faux Amber piece, at least that's what I was trying to do.
As for my template, well... time will tell... whether or not I succeed. Sorry for being so absent, and thanks if you keep coming hoping I have something to say :)
Ooooh, I uploaded the Industria ATCs from a swap I held on StampGropers/SGATC ... in November :) I quite like Picasa, though I have to figure out how to add the captions on my computer, before uploading ;) always something to learn, never a dull moment...
France